Showing posts with label tissue paper. Show all posts

Tuesday, October 19, 2010

4 way blue fabric card

I will confess straight away that I found this theme/design/layout 'somewhere' on the net, loved it so much I wanted to try it. I have no idea where it was or by whom. So if you know who, let me know because I'd like to add a link in recognition of the inspiration.
Of course it is not exactly the same, but pretty close, the 'back' is all my own work however. It's Bobs nieces birthday next week so I made this for her. She is having her 1st baby next month,she is in her mid-thirties, so I will be making my first 'baby' card, or fabric art, depending what inspires me at the time. No-one knows what sex it is so I cannot even start to think of a colour theme for that one.

Back to this card though:  I guess in reality it has 8 sides. I had my first go at fabric printing on my laser jet. I did cheat a bit as I used some heavy duty canvas sticky tape. I just stuck it down onto the printer paper, then cut it off.
Not a stick of wallpaper on this one! Because there is both paper and fabric covering both sides of each 'page' I decided not to put card on it, it makes it feel lovely and soft, but it is not floppy. Same for the envelope. Yes I realise the envelope is totally a different colour, but it was the only blue tissue paper I had. To see how I got the splattery effect on the tissue paper see the previous post to this one.


Every page is completely covered in fabric, except for the 2nd, which is vellum. Feathers from my garden, inked in turquoise.
This is the sort of back of the card, it folds up so that the happy birthday sentiment is the front, if that makes sense?
The blue heart is fabric too, on paper, and is padded. The 'Made for you' page paper is some horrid blue paper which I tea dyed, as I did with all the tulle used in the card.
This is the front of the envelope. If you can image really hard lol, its a scene with distant hills, fencing, grass and a lake. Maybe not? Too abstract? I tried to create a birds nest in the 'tree'. The word Fran, is the Ladies name....Francesca.
The rest of the photos, are just the page details:


Spattered Tissue paper technique

My First (sort of) Tutorial!
I thought I'd share this with you because it's something I found out accidentally and is so incredibly easy to do. Have a look at the effect I achieved on this plain Royal blue tissue paper:

Ignore the fact that I've covered the paper in Tulle.
Its just water. One single quick spray, left to dry and this is what turned out. I did try it on some pastel coloured tissue paper, nothing happened, so I think it's down to the type of dye used or the depth of colour.
I used to use this technique when painting with watercolours. The only reason I found out how to do it on tissue paper was because I accidentally dropped some water on said paper. Having witnessed the resulting blob, I decided to see what would occur with a quick spray and voila!
I would think one could do exactly the same for creating texture on Crepe paper.

Saturday, March 20, 2010

Womens cards now uploaded

Eventually I have got round to uploading the photos of all the 'Female' cards I have made so far. They have all been placed on the 'Cards for Women' Page:

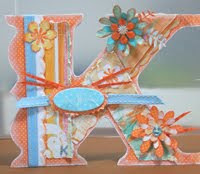
Card for kim: Letters K.I.M.
For Anna: Au Naturale
Tissue paper 'Stained Glass' Cat card
Native American Indian card


Friday, March 19, 2010

New Page: Cards for Men


I have tonight begun to upload photos of cards I have made for men, for various occasions. They are now located on a new page called "Cards for men"

I have placed all the Synthesizer, Get well, Valentines, Goth and Amur Leopard photos on this one page. I still have a few more other Cards to put on yet...maybe tomorrow.

Its rather a long page, and I dont like to see blogs that are miles long, they take forever to load. Thus I have to try and figure out how to split them up without using up the allotted 10 pages. I have not even started to load all the Female and Christmas cards yet. I also want to make another page for cards made for 'couples',  and another with the watercolour paintings I have done, making 5 pages earmarked already.

If Anyone knows how I can get rid of the massive gaps between the photos on the Mens Cards page, I would be extremely grateful if you'd let me know how, I've tried loads of things, and its driving me crazy, I hate the waste of space!

Anyway, all the photos I have of these cards have been uploaded tonight to the Mens cards page:


 Goth Card