Thursday, August 26, 2010

Freebies: Vintage Birds images

As Promised yesterday, here's just the beginning of  lots of Vintage Birds images.
I hope you find them useful
More Birds to come tomorrow.


Wednesday, August 25, 2010

Freebies: Vintage other Aquatic creatures

Here's the last of the Freebie Vintage 'Aquatic' creatures images which includes reptiles, water related birds and mammals.
Tomorrow, I will work my way out of the water theme, take to the air and start uploading birds. However I will upload Chicken ones separately as there's rather a lot of them. There's some really cute ones of birds, so watch this space!
I have scores of vintage animals to give you. Once they are all on my blog,  I have scores of vintage Angels, Fairies and Elves too.
As a side note, I am considering changing the look of my blog, it seems to of become a bit messy. Not sure what I am going to actually do to it yet though. I have cards to make first including a special 'keepsake' to make for my French neighbours recent grandchild's baptism, so my blog will have a wait a while.


Tuesday, August 24, 2010

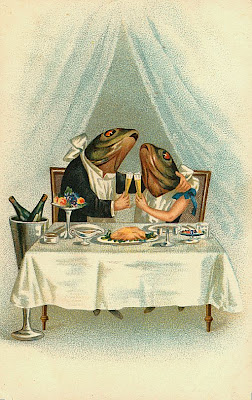
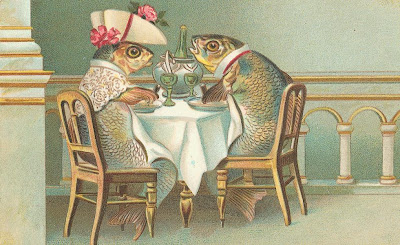
Freebies: Vintage Animals: Fish

Staying with the aquatic theme, today its Fish, if you are looking for vintage fish pictures, then here is a good selection.
Over the next few days, I will stick with the Aquatic theme which will include, turtles, crocodiles and probably I will add some general reptiles to this group.


Monday, August 23, 2010

Freebies: Vintage Animals Frogs

I take so much from the web and Blogs by means of inspiration, images and tutorials, I felt it time to give something in return.
I have these super vintage animal images which you are more welcome to take and use however you wish.
These images are just the first of a batch which I intend to share daily.
Starting today, its Frogs.
Simply click on the image to enlarge, then right click on image, then 'save as' to your PC


Thursday, August 12, 2010

Wedding card for bikers


I confess to seeing this style of card on another blog, and thought it would be perfect for my biker friends wedding card. A card in white, pinks and ivory just would not of been suitable for them, they are far too 'alternative'.

Its an easel card with an acetate window. I did not have any inks that would stick so I ended up drawing the swirls by hand on the acetate with a dip pen in Alcohol ink, as I don't know how to apply bottled ink to a stamp. I think the result is a bit 'naff' but I knew of no alternative. As it was I waited until the 'nth hour, as I'd ordered some stayzon ink pads which never arrived in time.

I made the little cherub from polymer clay in a mould and painted it silvery black. Again I have embellished with studs round the edge. The 'congrats' stamp is the only one I have, not much choice there then! I used removable body tattoo's on the acetate...the barbed wire. I sprayed everywhere with shimmer.

With this card, this was my first use of fabric flowers (see previous post). I've used quite alot of silver stickers, which is something I do not normally do. The envelope was made from good old wallpaper and for a change I decorated the back of the envelope instead of the 'front'

If anyone can tell me how to glue items to inked paper can they tell me, because I had terrible trouble, I had to scrape off the ink down to the paper to get the embellishments to stick.
To be honest, I think I like the envelope better!


Tuesday, August 10, 2010

FFF.....Fabric Flowers Fest

I am sure you've all seen how to curl up organza circles to make flowers. I decided to have an experiment with all types of oddments of fabrics I have. How satisfying to be able to almost burn something and end up with pretty flowers. Some did not work, wrong type of fabric, they just caught fire, they refused to melt. These fabrics will not be wasted though as there are plenty of other ways of making fabric flowers, sadly not involving flames!
The first lot I did were a bit large, so I scaled the next lot down a little.
Its quite a fussy operation cutting out all those circles, but worth it. For this experiment I used the same fabric on each flower, but now I know how they react, I will mix and match the various colours and fabrics.