
Showing posts with label acetate. Show all posts

Tuesday, October 12, 2010

Baptism project/keepsake


I am really disappointed in these photos I took of this, they are very very grainy. That's what happens under low lighting conditions. I've spent weeks making it, and now I am unable to show it at it's best. Oh well, c'est la vie.
Shut up and move on eh?

Some of the graininess of the actual people photographs is because the lady who took them forgot to use zoom, so I had a real job on my hands trying to improve them when they were cropped down so small.
For some reason the text has ended up highlighted, and I cannot get rid of it.
I think I'll give up for tonight and go to bed  lol
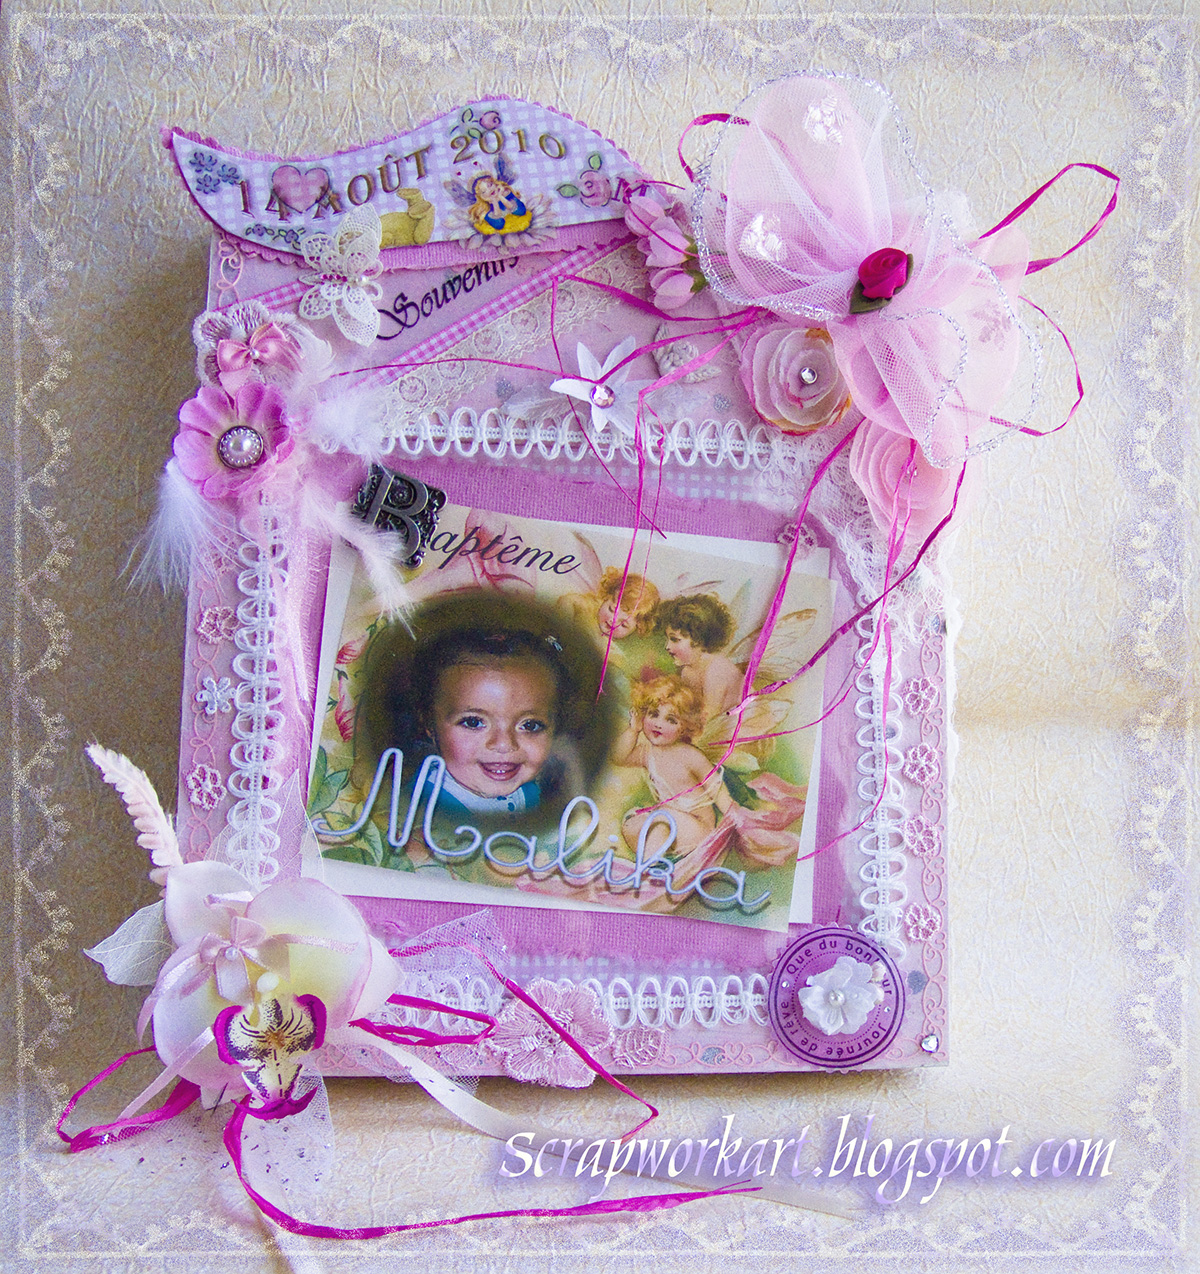

The white lace butterfly top left, I took off of a vintage brooch. The top right and bottom left flowers and elements were donated to me by Malikas' parents from the table decorations at the party. (Except for the 2 round pink flowers which I made)


Malikas' parents, (on the right), have a nickname for her: 'Princess' so I added the 'crown' to her photo, and the background, as she was in someone's arms in the original photo. This 'page' is my favourite.

As you can see, I still have not learnt to stamp straight...grrr!


I zigzag stitched the heart shaped photos onto ........Yeah! Wallpaper! cut into hearts.
I do not know if you can see, but the flower centres under the Ladies photo are tiny tiny mother of pearl buttons only about 5mm across which I picked up in a job lot of buttons recently. I do not 'do' cute, as such, but these buttons are definitely 'Cute'


I am not all that good at arranging photos, but obviously these had to be in 'relative' order. Apologies again for the poor photo quality.
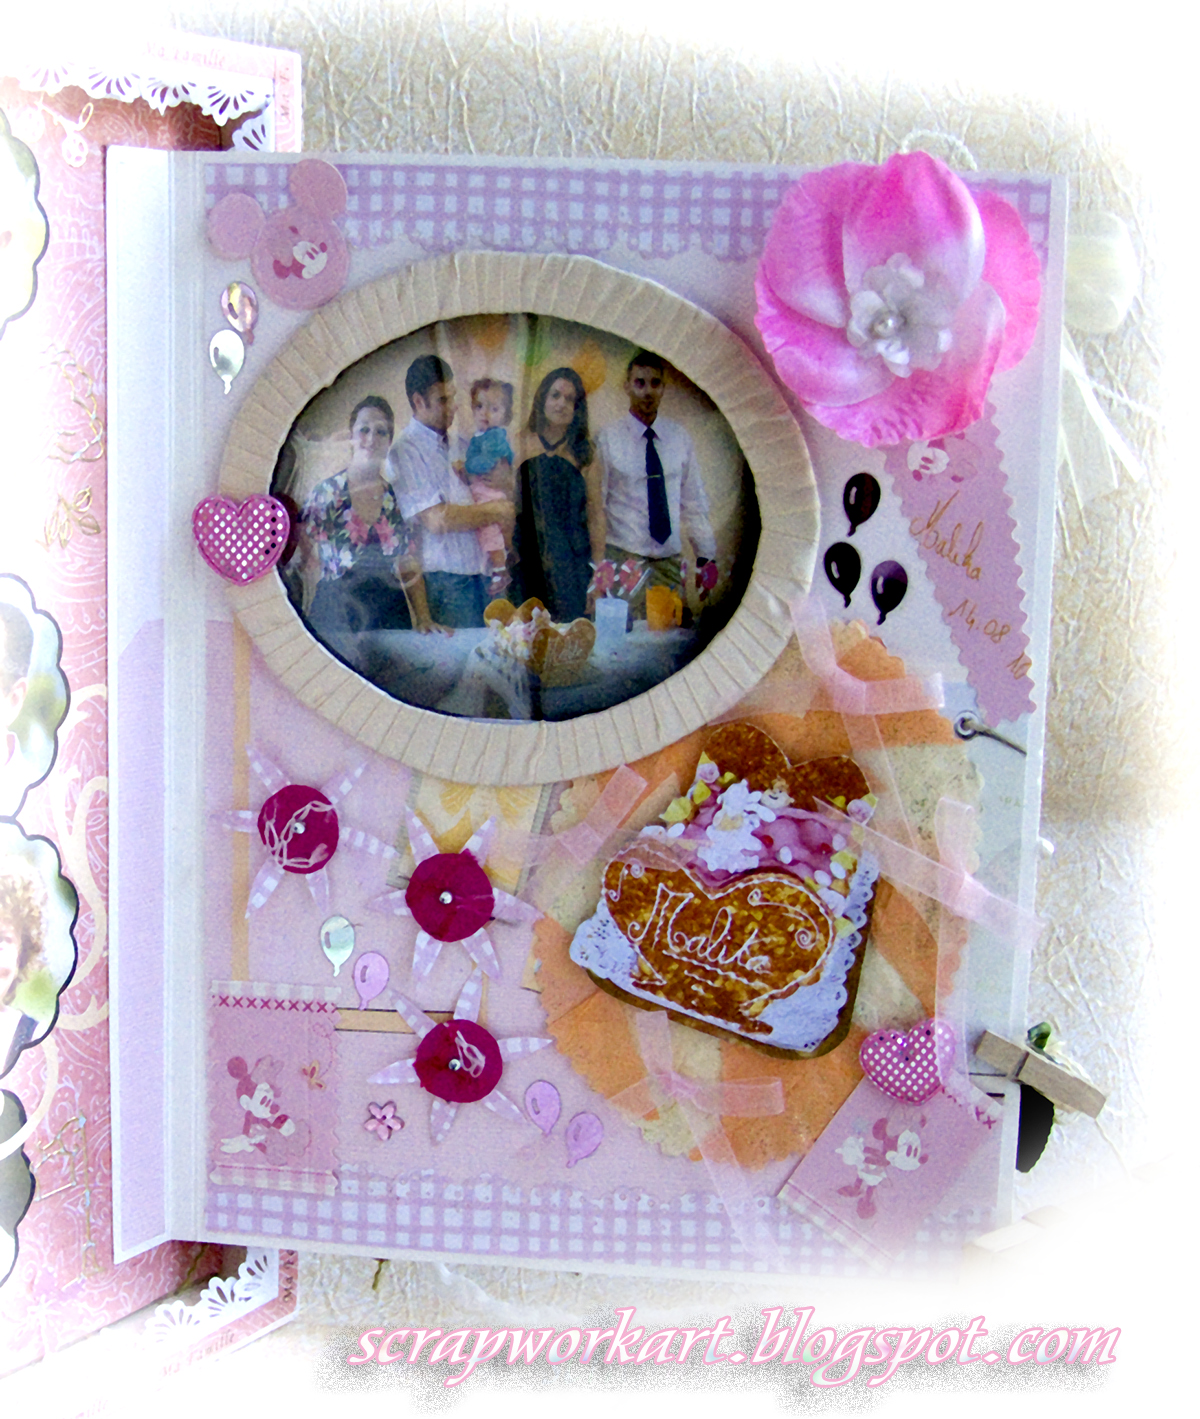
The Above is from the afternoon party, I copied some elements that were on the tables. The cake in the shape of a bed is a traditional design for French Baptism cakes. The peachy and cream background of the cake picture I made from paper decorations they had hanging round the walls. The picture frame, is a chipboard oval I made and I wrapped ribbon round it, put an acetate sheet over the photograph.
The Disney elements come from a box of almonds that I was given by them as a souvenir. Bob ate them as I am now allergic to nuts...nuts!  The pink garish 'rose'/flower I made from donated petals that they had spread over the tables.
This project just looks so much better in real life...honestly!


Wednesday, September 15, 2010

Curved Window Card

I fancied having a crack at making a curved window card. I didn't do a fancy shaped window, or even frame it, I just thought I'd keep it straight for simplicity....maybe another time be a bit more adventurous.


I did have to reinforce the inside with some thick plastic, which cannot be seen with ordinary viewing of the card, but can be seen here because of the angle of the photos. I could of covered them in paper but then that would have blocked out the light.


I made the cherub from air drying clay in a silicone mould. Sentiments created in Photoshop, printed onto textured watercolour paper. The same for the photograph inset into the clock, but on ordinary paper. I butchered up some silk flowers for the card. I did make my own, but they are on the 'pillow shaped' envelope, which I will photograph tomorrow.


I think thats about all I can tell you about this card really, the photographs speak for themselves. The 'technical' bit was creating the envelope, designed so it curves out.....you'll see it tomorrow...I hope.


Thank you for looking.


Friday, September 10, 2010

Fabric card for a young Goth lady


Hello again, 2 postings in one day and changed the look of my Blog! Busy busy busy.
 I've just completed and sent this card for my Brothers Girlfriend who is a Goth with leanings towards Steampunk. I wanted to make a shabby chic fabric card but it had to be in dark colours. I made all the flowers, the back and front of the card is based on black velvet. 


I followed the colours on the centre image which I felt was appropriate for this card.


The image is actually covered over with acetate. I did try printing it onto fabric but my laser-jet printer did not want to know. I'd like to do fabric printing so I need to get the correct transfer papers to do this.
The frame surrounding the actual image was my first use of the new 'ruffler' foot I bought for my sewing machine. It worked a treat. There's going to be ruffles everywhere now! They are 'sew' easy to do! 
My machine is about 20 years old, and I now find myself drooling over new or used ones on eBay that do lots of fancy stitching.


Envelope made from wallpaper.....as usual.


Saturday, June 19, 2010

3D Rainbow, easel type card

Always use a tripod eh? Especially when you wobble about like I do when trying not to!
So, the photos of the Rainbow card have turned out reasonably good for posting.

I made this for a lady who has always loved bright colours, especially rainbows. She now works for 'Rainbows' which is an organisation in UK which is something to do with children.
Originally I was going to do a basic rainbow easel card, but you know how it is, these things take on a life of their own.
For a change I made my own flowers this time, very thick ones too. The pots of gold I printed on my PC and I added some 'coins' spread out on the ground in front of each pot. The back of the card is clear acetate with a clear 'roof' like section from which I hung a double sided Sun and 2 silver lined clouds, so they twizzle round behind the rainbow.
Getting the lot to stand upright was tricky, in the end I placed a small pull out flap at the back to balance it all. I wont be making an envelope for this one as it would become crushed in the post so its going into a thin box, which I will decorate the inside at least.


Friday, May 14, 2010

All white???

I never did make the mans 'hessian' card, I was out by a week on his birthday. An opportunity missed. However my Friend Val, its her birthday too next week and it was a perfect excuse to create a white card. I have been wanting to do a white card for a while and thought I'd have to wait until Xmas, or a wedding (too rare) so here it is my shabby chic white card.
Only problem was, was writing 'happy birthday' I did not want to use any colours. So I used some tiny bits of vellum I had left over, and blindly embossed on it by hand with a cuttlebug folder. I am not too happy with the result but I could'nt think of any other way. My one and only 'happy birthday' stamp was too large. Thats why I'm not keen on stamps. The vellum was then glued to clear acetate. I dont have any clear 'gems' unfortunately which I really would of liked to of added.
I wanted to add lots of textures and have a lavish amount of flowers bunched together. I've seen thhis done on other cards but mine, well, I dont think I have quite got the hang of it. Other than that I am happy with the result. I made a matching envelope out of white textured wallpaper which I'll photograph tomorrow.
 So here's the white card, all white?