Showing posts with label embossing. Show all posts

Wednesday, May 18, 2011

1st Birthday Card

Pink and Girly. That was my friends instructions to me to make her Granddaughters 1st Birthday card. 


As anyone knows, I have great difficulty with 'baby' cards, this was no exception, but I did decide to let the inside be fairly plain this time.


I used a Vintage French postcard in the center, and basically anything Pink I could find. The envelope, I totally covered in crystal organza. Annabella was embossed onto vellum. What I did was printed out the name in the font, reversed it, embossed the vellum on a piece of firm sponge, using the print off as a direct template.


I used lots of fabrics on the front, made my own flowers as usual. Shame the whole thing is a bit 'blocky' all squares and straight lines, inspiration was lacking. 


The lady who ordered it has asked me to make another card, so she couldn't of been too disappointed with this rather uninspiring (I think) effort.


Friday, December 31, 2010

Fabric Album 3 pages done

It is New Years Eve, and I cannot believe that my last posting was December 17th, prior to Christmas, ages and ages ago!
So I thought I'd better start showing what I have been doing all this time.
For a long time I have wanted to make one of those vintage tattered fabric albums or book. Only one way....get on with it.
This one is not yet complete, I have only finished 3 pages of 6. It is going to be a friendship book for someone I have known for many many years. She and her family visited in 2010 and I did not realise just how much I missed her company, I have'nt seen her since moving to France in 2004.


The idea is to make a page for each letter of her name, 5 pages plus the cover.
Today I am going to show you the first page.


T is for Turquoise, Time and Treasure


Tuesday, October 12, 2010

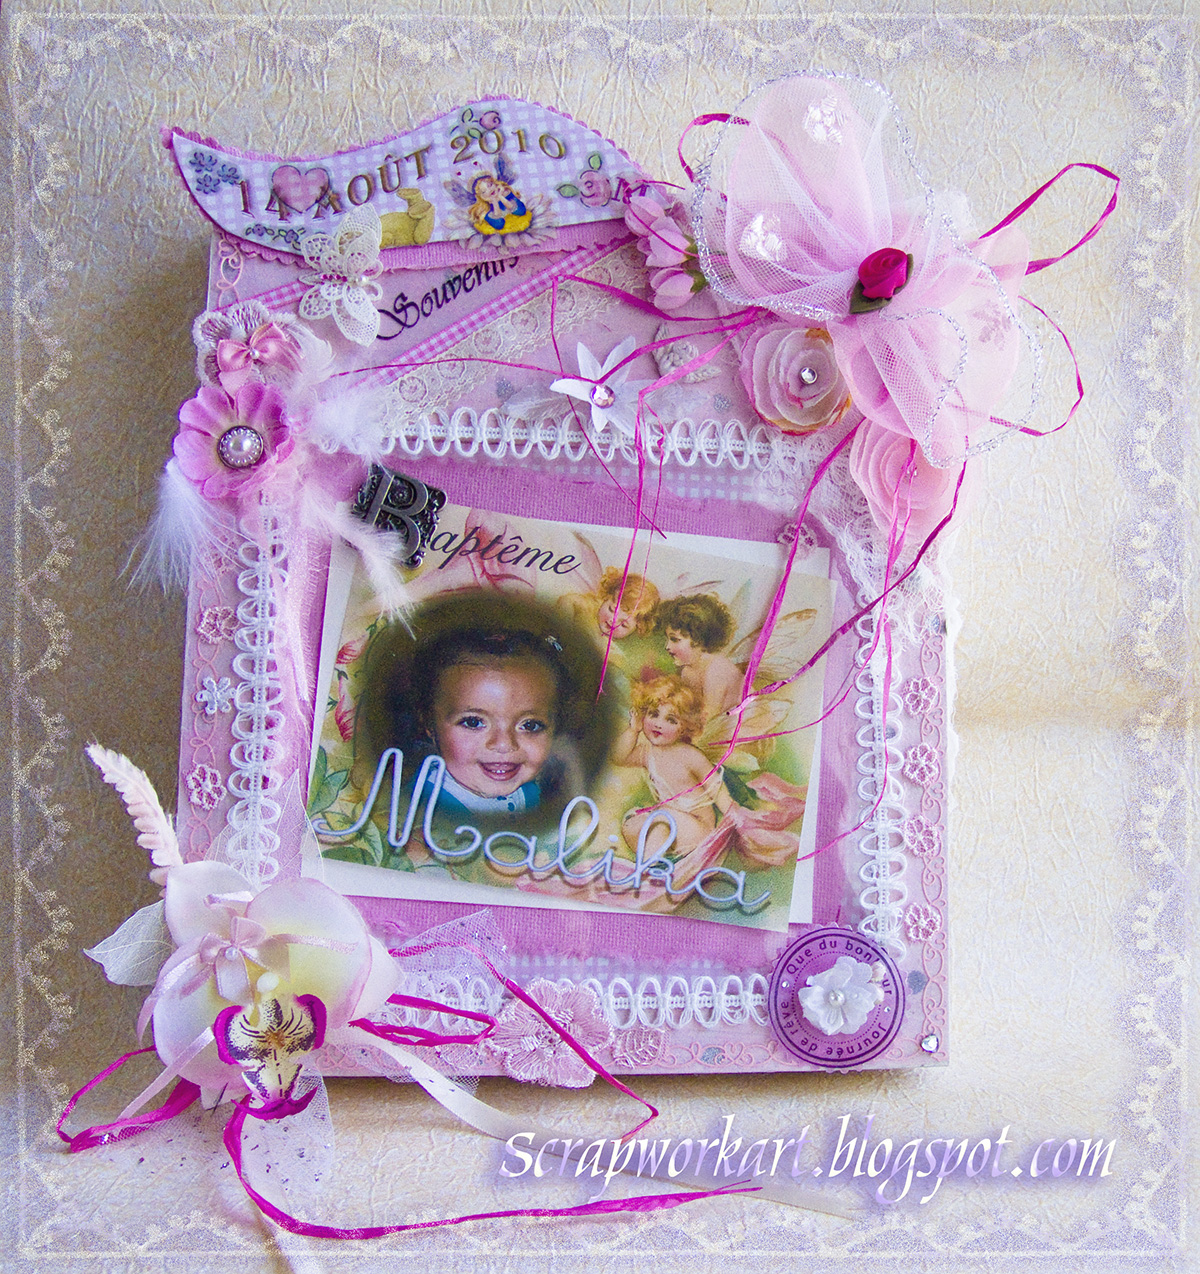
Baptism project/keepsake


I am really disappointed in these photos I took of this, they are very very grainy. That's what happens under low lighting conditions. I've spent weeks making it, and now I am unable to show it at it's best. Oh well, c'est la vie.
Shut up and move on eh?

Some of the graininess of the actual people photographs is because the lady who took them forgot to use zoom, so I had a real job on my hands trying to improve them when they were cropped down so small.
For some reason the text has ended up highlighted, and I cannot get rid of it.
I think I'll give up for tonight and go to bed  lol


The white lace butterfly top left, I took off of a vintage brooch. The top right and bottom left flowers and elements were donated to me by Malikas' parents from the table decorations at the party. (Except for the 2 round pink flowers which I made)


Malikas' parents, (on the right), have a nickname for her: 'Princess' so I added the 'crown' to her photo, and the background, as she was in someone's arms in the original photo. This 'page' is my favourite.

As you can see, I still have not learnt to stamp straight...grrr!


I zigzag stitched the heart shaped photos onto ........Yeah! Wallpaper! cut into hearts.
I do not know if you can see, but the flower centres under the Ladies photo are tiny tiny mother of pearl buttons only about 5mm across which I picked up in a job lot of buttons recently. I do not 'do' cute, as such, but these buttons are definitely 'Cute'


I am not all that good at arranging photos, but obviously these had to be in 'relative' order. Apologies again for the poor photo quality.

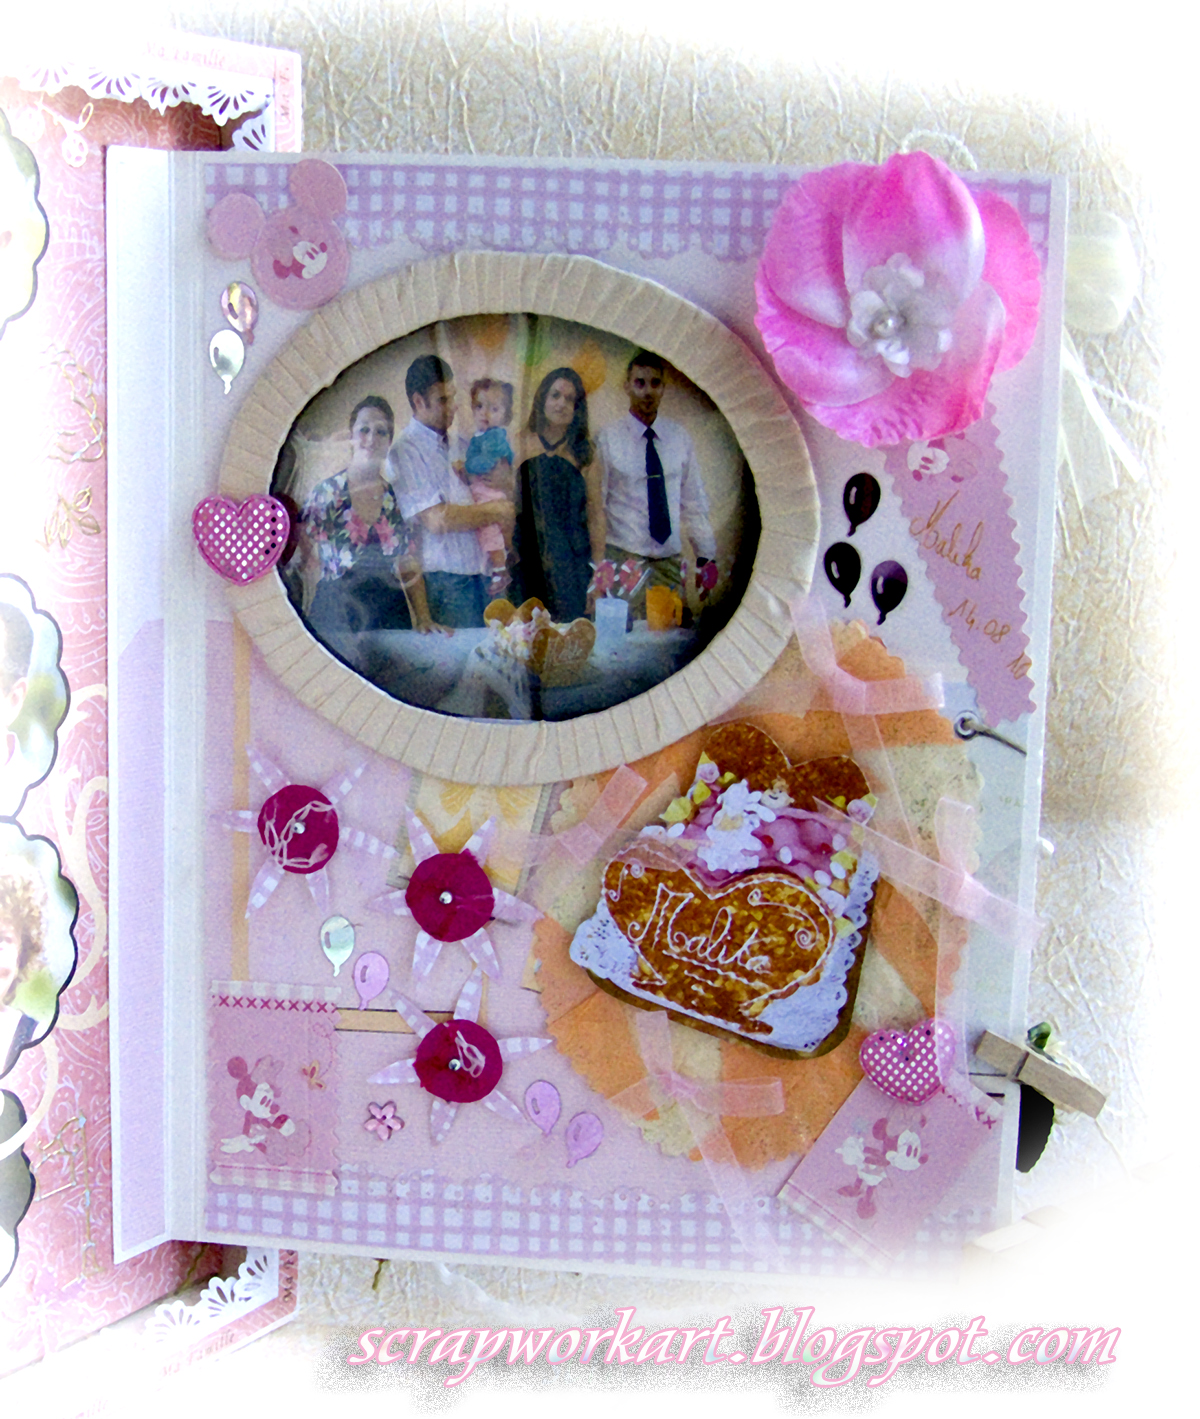
The Above is from the afternoon party, I copied some elements that were on the tables. The cake in the shape of a bed is a traditional design for French Baptism cakes. The peachy and cream background of the cake picture I made from paper decorations they had hanging round the walls. The picture frame, is a chipboard oval I made and I wrapped ribbon round it, put an acetate sheet over the photograph.
The Disney elements come from a box of almonds that I was given by them as a souvenir. Bob ate them as I am now allergic to nuts...nuts!  The pink garish 'rose'/flower I made from donated petals that they had spread over the tables.
This project just looks so much better in real life...honestly!


Friday, October 1, 2010

Upload problems, Anniversary card, free images

Before I start, I just want to say that I have spent most of tonight trying to post this. Images would not upload, it was driving me nuts. In the end I resorted to using Internet Explorer. Normally I use Google Chrome, and have never had problems, except for tonight. So I tried Firefox (I have all 3 of these browsers) and that would not have it either.
So if you too have been having the same difficulties with your Blog Posts, try using a different browser. Remember that Googlechrome and Firefox browsers are generally more efficient than Internet Explorer, and they are also FREE!

25th Silver Anniversary card.
It does not open up, there is only a front and a back because the lady who ordered it wants to frame it, so there was not much point in having 'pages' that would end up being hidden. Hence the back is fairly plain too.
 
Because of this 'restriction' I made it an oval shape.  The 'embossed' heart is in fact  part of an embossing stencil, then reversed to create the heart shape. I've been wanting to emboss on shiny cardstock for ages! The little purple spots are left overs from a silver sticker border, I just dibbed a bit of purple in the middles.
 
The white flowers on the left, hanging down (above photo) I cut from a silk flower bouquet.
 
I made all the flowers myself, fabrics and vellum, except for the large flower which is made from parts of a silk flower with paper flowers in the centre.

By the way, I chose Lilac as the secondary colour (from silver) because Irises are the flower for 25th Anniversaries. I couldn't find any suitable Iris images but went with their colour anyway.
The background paper is wallpaper which I also used to make the envelope....of course :o)
As it was, believe it or not, the actual card is simplified down to what you see, from all the 'stuff' I wanted to incorporate!


All edges of the envelope have been inked, with ordinary ink, which stuck surprisingly well to the wallpaper.
The little bit of gauze at the top of the tag was a mistake. It was on my worktop when I was making the tag and it accidentally became stuck to the tag. I quite liked it so left it on.

 
The small metal silver embellishment on the front of the envelope came from an old pair of earrings I had, as I had already used the beads as a dangly embellishment off the lilac flower, on the card, right hand side.

The dates 1985 and 2010, were made in photoshop and stuck inside the 'flap' thing on the tag. 'Robert' the same, also done on some nice bits of soft textured paper I had.

I edged the back cuts with silver border stickers, and added a ready made 3d heart
Finally, the back of the card, created in Photoshop. The full poem/verse can be read on a previous post. I made it up myself, and is quite traditional, except for the last line.


Here are your  Freebie images afterall! More of them tomorrow.

Nearly the weekend! Hoorah!


Wednesday, March 31, 2010

WORK IN PROGRESS: The Tip & a new card made

We've all seen photos of other peoples tidy, spick and span craft rooms...yeh right :o)
Well just for a reality check, have a look at my craft room ( or lack of room)  at the end of a session of making just one single card.
I'll have a tidy up before I start my next card...case of having to!

New Card made: Birthday card for female, Theme Art Nouveau, Alphonse Mucha images and Anja's Embossing stencils used in cuttlebug:
Amazingly, as it transpired, the lady I made this card for is a huge Art Nouveau fan, which I did not know! How's about that for intuition or jolly good luck?


The greeting on the back is done in Photoshop, as was 'Lisa' on the front of the envelope.


Wednesday, March 17, 2010

Card made for Anna March 2010


This lavish card is full of dried natural elements reflecting Anna's love of gardening and her 'pagan' beliefs. Some of the embellishments were taken from my own garden. The cardstock was plain white card, I painted the edges with watercolours. The papers were what I happened to have, including G45 paper 'Botanica' which I used on the back.
The right hand flower was composed by me, apart from the cream coloured rose. The bow was made from sack-cloth. Part of the flower has 'string' type petals which I pulled off the sack and glued together in the middle. Just about everything is distressed and edged with distressing inks.
Matching envelope also made.
Surprisingly this card folds up quite well, considering how much 'stuff' I put on it.
And if you are wondering about the verse line implying a 'choice' of date, that is because Anna does not know her date of birth and just chose March the 29th.
I really enjoyed making this card. In hindsight, I would of made it just as 3 folds instead of the 2 additional cuts.
Anna is an author of many books: www.myspace.com/annafranklin2